
UVdesk has overcome a lot of issues that held it back from becoming the Enterprise Level Helpdesk System. UVdesk comes with an open source helpdesk ticket system having lots of features like saved replies, prepared responses, automated workflow, numerous agent’s, multilingual, mailbox support and much more.
UVdesk Opensource community skeleton is built on top of Symfony/PHP framework that is recognized as the fastest PHP framework among the developer.
In this article, you will learn how to install Symfony/PHP based UVdesk open source project on your local server without downloading a zip file. So let’s start!!
UVdesk Open Source Installation Video Guide
![How to Install Open Source FREE Helpdesk - UVdesk in Linux [ ubuntu ]](https://i.ytimg.com/vi/u9OQsFnvj34/hqdefault.jpg)
System Compatibility Requirements
Before creating your UVdesk Helpdesk project, make sure that you have already installed all the following Prerequisite –
-
- PHP 7.2 or higher (latest version), also support PHP 8
- Composer: Composer 2
- Package: Bitnami
- Server: Apache
- Database: MySQL
Follow below-mentioned steps to launch Enterprise Opensource Helpdesk Project –
Step 1 – Go to Document Root
Once you have completed installation of both needed PHP extensions your next step is – open the terminal in your system. Now, go to document root likewise shown in image below(my server document root is – /www/html/)
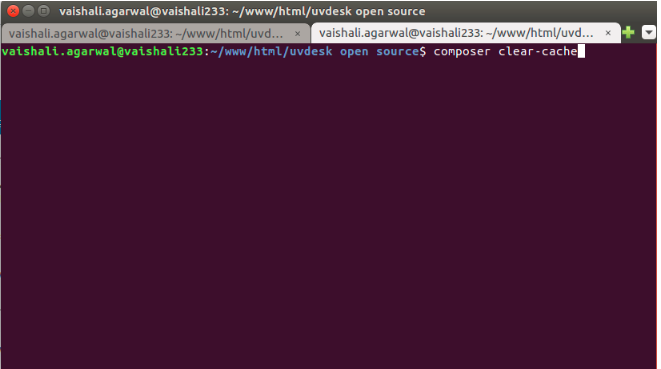
Note – To clear cache in composer you can use this command – composer clear-cache

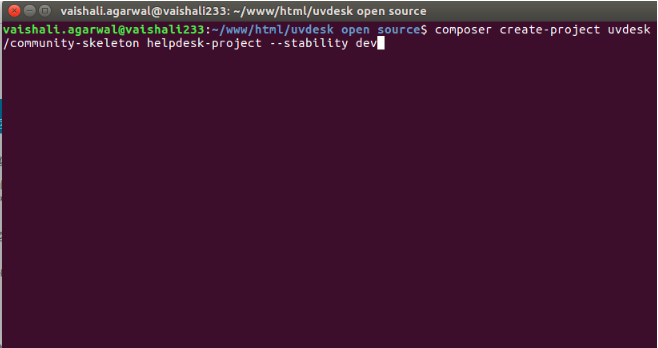
Step 2- Create The Project
To create your project on to your local machine or server you need to run the below command :
|
1 2 3 |
<strong>First command - composer create-project uvdesk/community-skeleton helpdesk-project --stability dev </strong> |

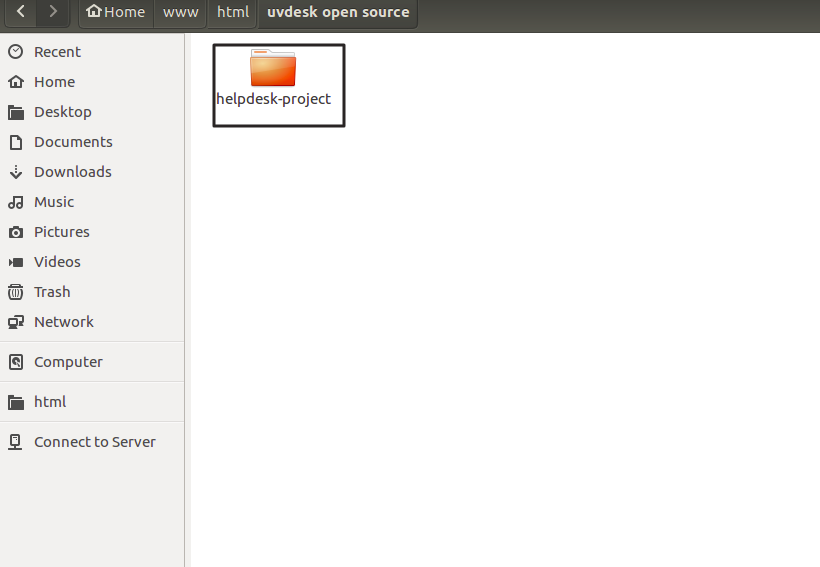
Step 3 – Project Created Successfully
After creating your project, you should see the “Helpdesk- project” directory inside your document root and all of the code will be inside it.

Step 4 – Go to Public Folder
Now, in this step we’re launching open source helpdesk software, go to your preferred browser and type in the url http://localhost/folder/public or http://website.com/public pointing to your public folder residing under project directory.
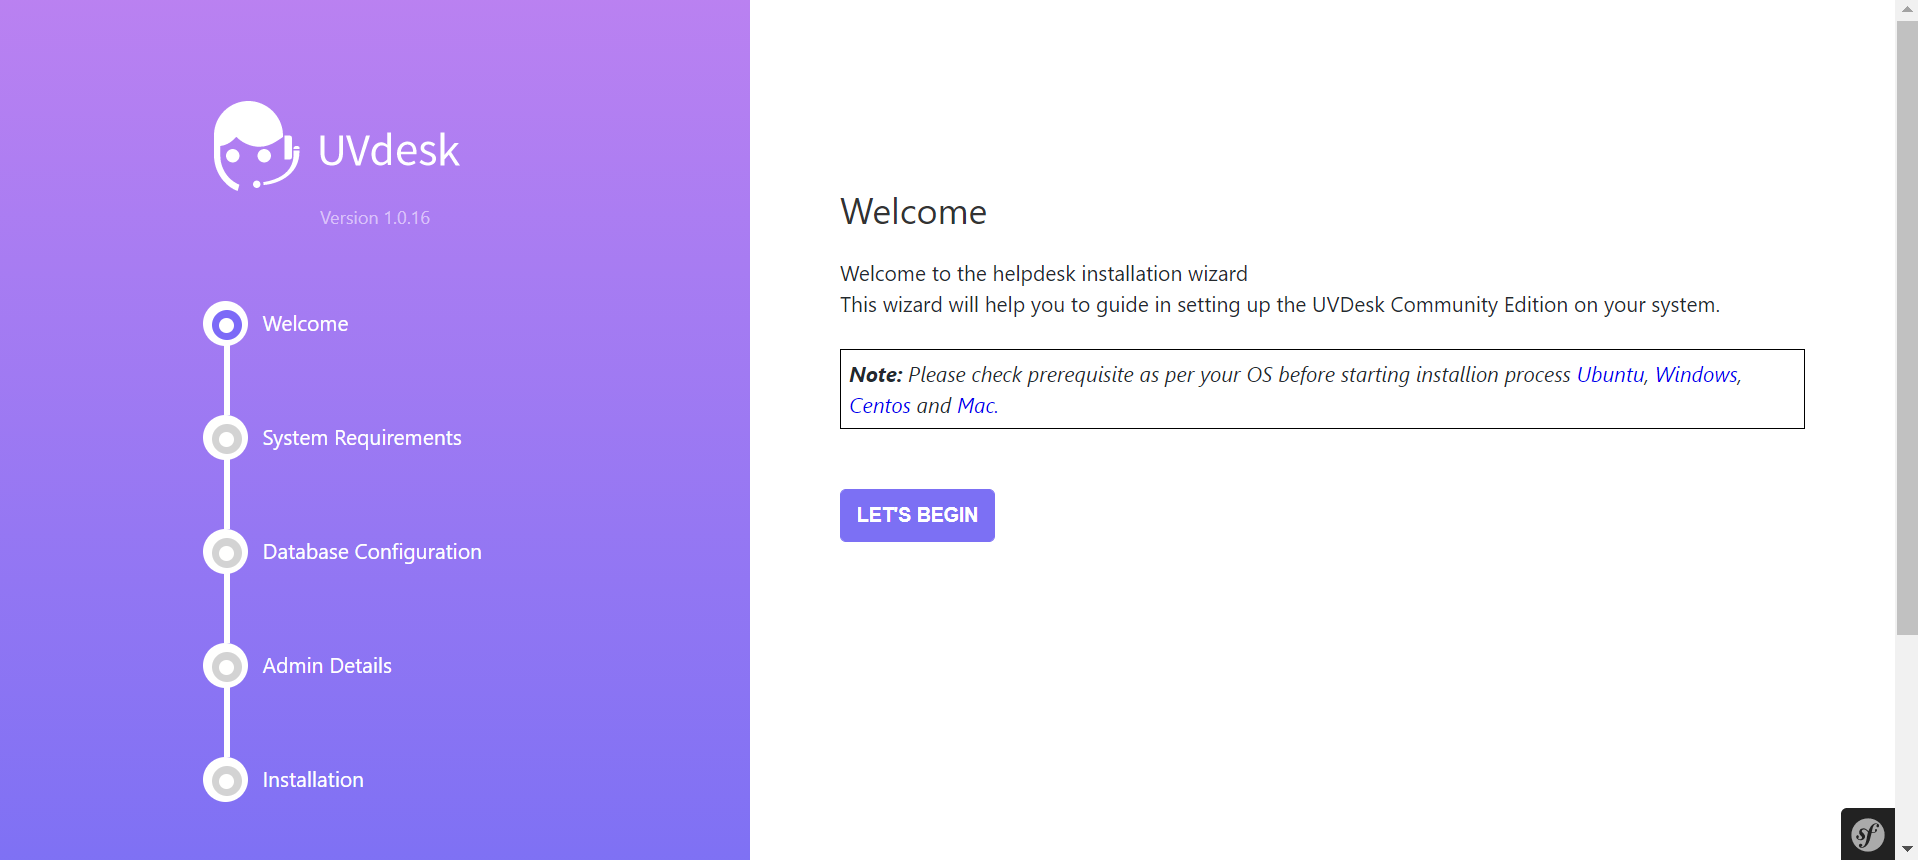
Step 5 – Setup Page
Now you are on the manual setup page of your custom helpdesk.

Step 6 – Evaluating System Requirement


Step 7 – Configure Database
Configure application with the database by filled out database details.


Step 8 – Create Admin Login Account
Proceed with following instruction, to create an admin account.


Step 9 – Website Configuration


Step 8 – Install Now


Step 10 – Migrating With Database
Now, Helpdesk project is ready to be installed and migrating with database.


Step 10 – The Helpdesk Has Been Installed Successfully on Windows


That’s the end of this Lesson. Such a simple and easy UVdesk installation process, right? If you don’t want to install helpdesk project via composer, Here is a guide to help you get started:
Installation of Opensource Helpdesk – UVdesk on Ubuntu
How to Install Open Source Helpdesk Project on Mac – UVdesk
Open Source Helpdesk Installation on WAMP – UVdesk
Open Source Installation on Windows- UVdesk
Hope that this post will help you to successfully install UVdesk Opensource – an Enterprise Opensource Helpdesk System.
For any doubts or suggestions regarding the helpdesk get back to us at support@uvdesk.com or raise a ticket at our Helpdesk system.