INTRODUCTION
UVdesk is a fully functional open-source web-based ticketing system built on famous technologies such as Symfony/PHP and backbone.javascript framework.
It’s a pack of incredible features for handling customer queries by using various tools & tactics that saves time and agent workload.
FEATURES OF UVDESK OPEN SOURCE HELPDESK
Drafting out the feature list of UVdesk Open Source helpdesk:
- Translation Support (Multilingual)
- Unlimited Agents, Group, Team, Customers, Tickets etc
- Agent Privileges
- No limit on the number of Mailbox/Email integration
- Saved Replies for common queries
- Filter based on ticket status, Id, agent, customer, etc
- Block Spam
- Standard automated workflows
- Notes for agents
- Custom branding
- Change logo & favicon
- Broadcasting message
- Ticket Forwarding
- Prepared Response
- Email Notification
- Effective search
- User-Friendly Web Installer
- Add multiple attachments
- Powerful Knowledgebase/Faq (article, category & folder)
- Ticket types, Multiple Tags
- Email Templates
UVdesk Installation PrePrerequisites
Hardware Requirement
- Processor: 1.60GHz or higher
- RAM: 3GB or higher
Software Requirement
- Ubuntu 16.04
- PHP 7.2 or higher
- Composer: 1.6.5 or higher
- IMAP extension
- MailParse extension
- Server: Nginx
- Database: MySQL
1). Install Nginx and MySQL
In this step, we will install Nginx and MySQL server from the Ubuntu repository.
Install Nginx
The very first we need to make sure that our repository information is up to date and then install Nginx
Step 1: Update Ubuntu repository:
|
1 |
<span style="color: #0e101a;">sudo apt-get update</span> |
Step 2: Then, install Nginx
|
1 |
<span style="color: #0e101a;">sudo apt-get install nginx</span> |
Step 3: Now start Nginx with the following command:
|
1 |
<span style="color: #0e101a;">systemctl start nginx </span> |
|
1 |
<span style="color: #0e101a;">systemctl enable nginx</span> |
Now the installation of the Nginx web server has been completed, check the Nginx service using the following command.
|
1 |
<span style="color: #0e101a;">systemctl status nginx</span> |
Now make sure all the services are running by checking the server port of the services:
|
1 |
<span style="color: #0e101a;">netstat -plntu</span> |
Install MySQL
Step 1: Install MySQL using the apt command below:
|
1 |
<span style="color: #0e101a;">sudo apt install mysql-server mysql-client</span> |
Step 2: Now, start the MySQL service and enable it
|
1 |
<span style="color: #0e101a;">systemctl start mysql </span> |
|
1 |
<span style="color: #0e101a;">systemctl enable mysql</span> |
Step 3: Now check the MySQL service using the following command:
|
1 |
<span style="color: #0e101a;">systemctl status mysql</span> |
During installation, you will be asked for the MySQL root password, make sure enter a secure MySQL password.
Now, the installation and configuration of MySQL database have been completed.
2). PHP and PHP-FPM Installation
In this step, we will install PHP 7.2 or 7.3 and all of those extensions and then configure PHP to run with Nginx web server.
Step 1: First run below command:
|
1 2 |
<span style="color: #0e101a;">sudo add-apt-repository ppa:ondrej/php </span> |
Update:
|
1 |
<span style="color: #0e101a;">sudo apt-get update</span> |
Install PHP-FPM 7
Step 1: Run below command
|
1 |
sudo apt-get install -y php7.2-cli php7.2-mysql php7.2-cgi php7.2-fpm php7.2-gd php7.2-imap php7.2-xml php7.2-mbstring php7.2-intl php-apcu |
Step 2: Now, go to the PHP 7 directory and edit the php.ini file.
|
1 2 3 |
cd /etc/php/7.2/ vim fpm/php.ini |
Step 3: Uncomment the cgi.fix_pathinfo line and change it’s value to 0.
|
1 |
cgi.fix_pathinfo=0 |
Save the file and exit vim.
Step 4: Now restart php7.2-fpm and add it to start at the boot time:
|
1 2 3 |
systemctl restart php7.2-fpm systemctl enable php7.2-fpm |
Step 5: After that, Go to the Nginx virtual host directory and edit the default virtual host file with vim to work with Nginx web server.
|
1 2 3 |
cd /etc/nginx/sites-available/ vim default |
Step 6: Uncomment the PHP 7 configuration line below:
|
1 2 3 4 5 6 7 8 |
location ~ \.php$ { include snippets/fastcgi-php.conf; # # # With php7.0-cgi alone: # fastcgi_pass 127.0.0.1:9000; # # With php7.0-fpm: fastcgi_pass unix:/run/php/php7.0-fpm.sock; } |
Save and exit, then restart the webserver.
|
1 |
systemctl restart nginx |
3). Install PHP Imap & Mailparse
UVdesk requires some PHP extension(Imap & Mailparse) for the installation.
Mailparse Extension
Step 1: Run the below command:
|
1 |
<strong><span style="color: #0e101a;">For php7.2</span></strong><span style="color: #0e101a;"> - apt-get install php7.2-mailparse</span> |
Or
|
1 |
<strong><span style="color: #0e101a;">For php7.3</span></strong><span style="color: #0e101a;"> - apt-get install php7.3-mailparse</span> |
Or
|
1 |
<span style="color: #0e101a;">pecl install mailparse</span> |
If all is done, go to the php 7.2 or7.3 directory and edit the php.ini file.
Now, add “extension=mailparse.so” in the php.ini file of the PHP version you are using.
When you are finished editing your php.ini, you will need to restart your web server.
Step 2: Run the following command:
|
1 |
systemctl restart nginx |
IMAP EXTENSION
Step 1: Run the below command:
|
1 |
<strong><span style="color: #0e101a;">For php7.2</span></strong><span style="color: #0e101a;"> - apt-get install php7.2-imap</span> |
Or
|
1 |
<strong><span style="color: #0e101a;">For php7.3</span></strong><span style="color: #0e101a;"> - apt-get install php7.3-imap</span> |
Check PHP version and Nginx by creating info.php file:
|
1 2 |
cd /var/www/html/ echo '<?php phpinfo(); ?>' > info.php |
Open your web server URL in a Browser and visit the server IP address pointing to info.php
http://localhost/info.php
You will get information about your PHP configuration.
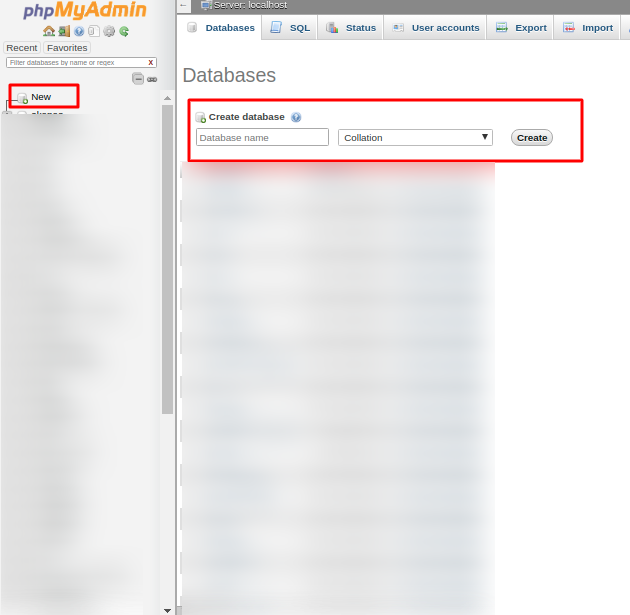
4). Create Database for UVdesk
Now, we will create a new database and MySQL user for UVdesk. Login to the MySQL with your MySQL root password.

Click on new button then enter the database name to create a new database as shown below:
5). Download and Configure UVdesk
Step 1: Use the composer to set up your project by running the following command from your terminal:
|
1 |
$ composer create-project uvdesk/community-skeleton helpdesk-project |
Or
Download the zip archive by using below command:
|
1 |
$ wget <span class="pl-s"><span class="pl-pds">"</span>https://cdn.uvdesk.com/uvdesk/downloads/opensource/uvdesk-community-current-stable.zip<span class="pl-pds">"</span></span> -P /var/www/ |
Step 2: Extract the file:
|
1 |
$ unzip -q /var/www/uvdesk-community-current-stable.zip -d /var/www/ |
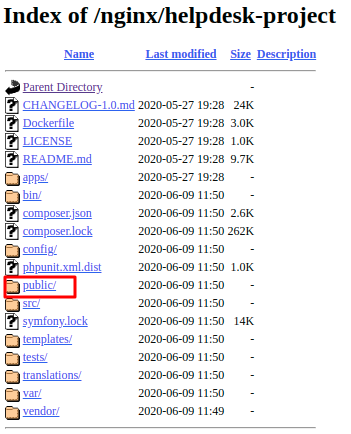
6). Install UVdesk Using Web Installer Wizard
Step 1: Browse your installed helpdesk project and point it to the public folder
For example – http://domain/installed_folder/public/
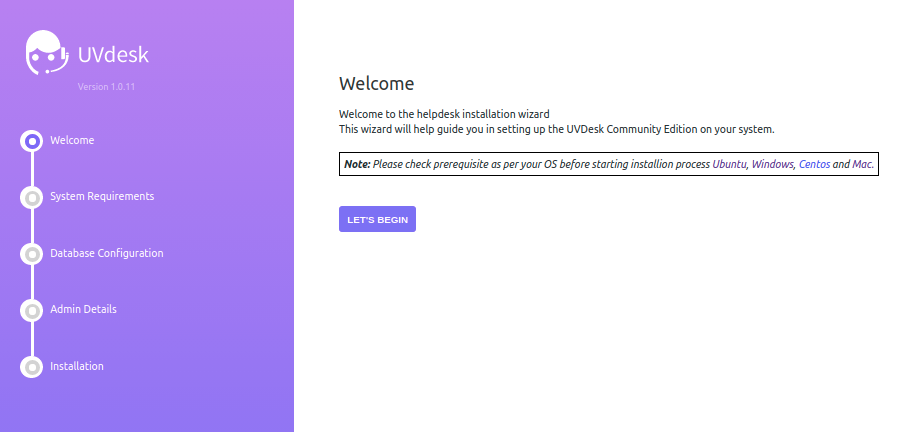
Step 2: Click on let’s begin button to set up the project
Step 3: Evaluating System Requirement
Make sure you have installed all required extension, if not this will show an error in red mark.
Common Error: “Unable to locate path on the server”
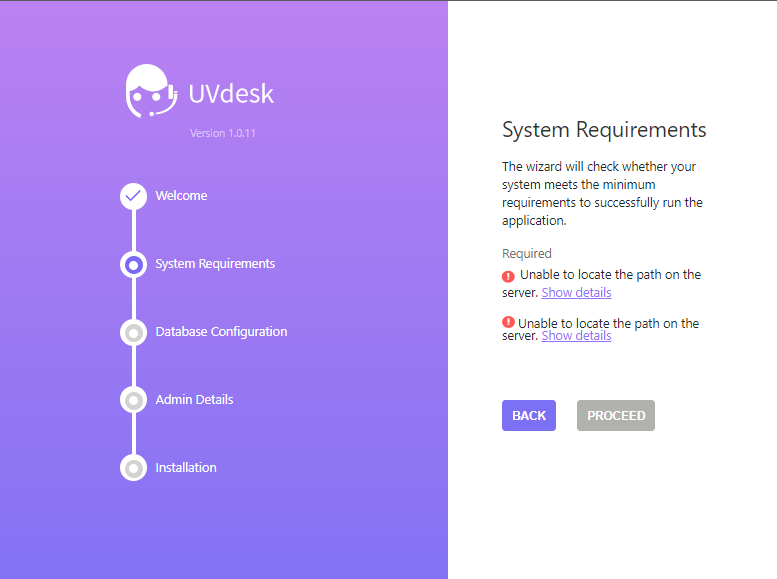
Solution: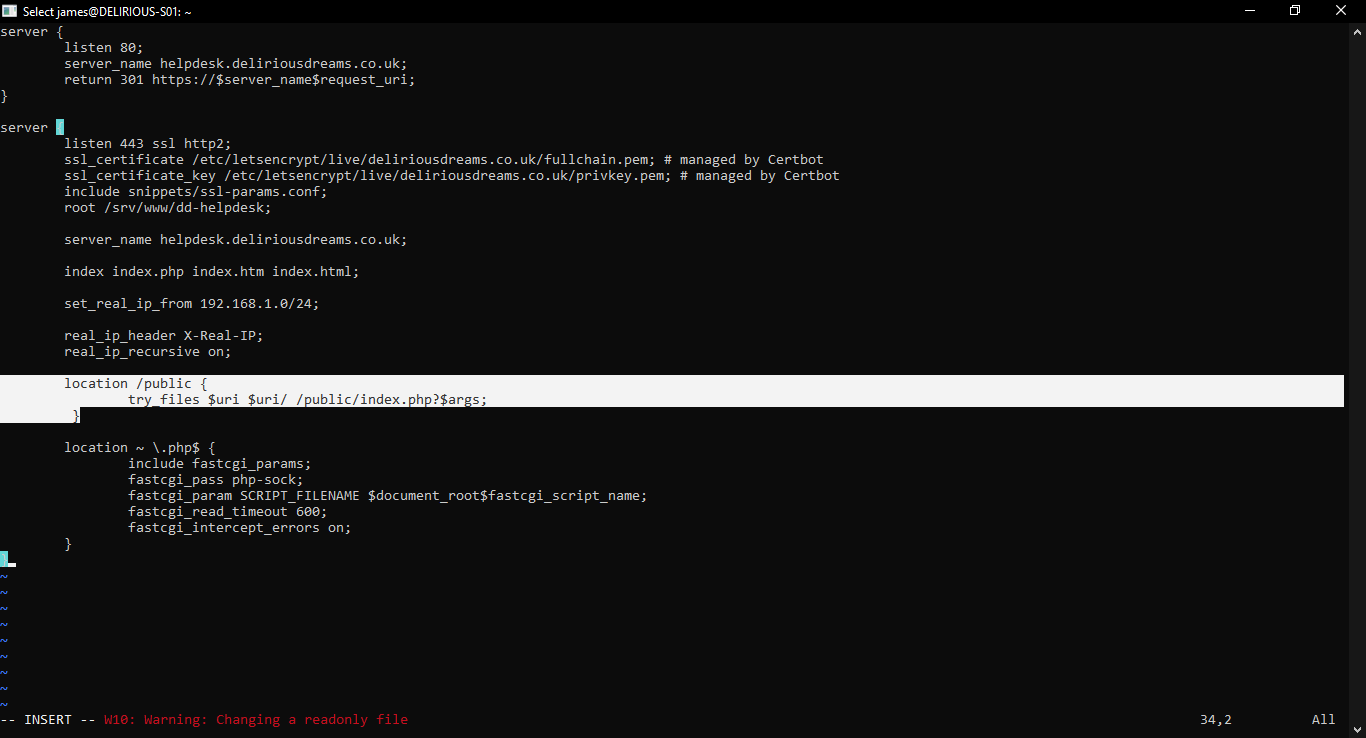
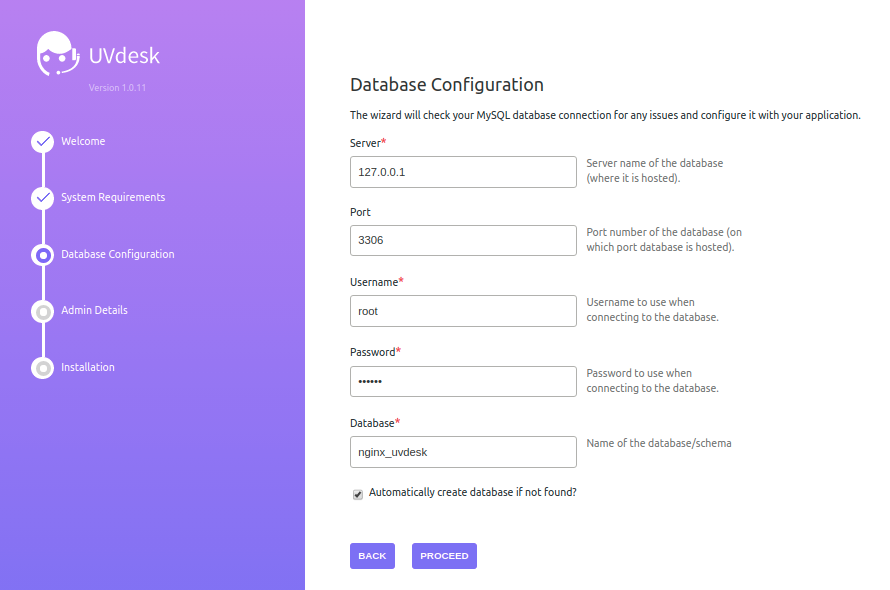
Step 4: Click on proceed to configure database
Fill the database details such as server name, port name, user name, password and database name.
Note: Make sure your database password does not contain some special character(such as #$%@)
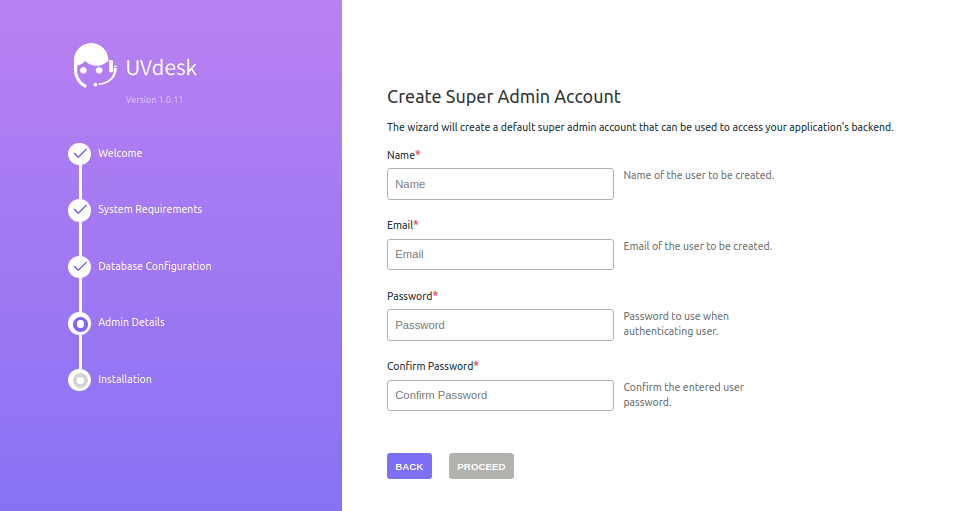
Step 5: Create a super admin account
Type admin name, email, and password for the super admin account.
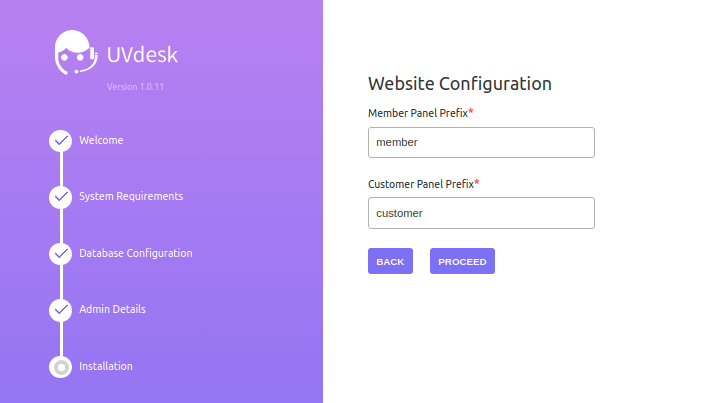
Step 6: Website Configuration
Enter member and customer panel prefix here.
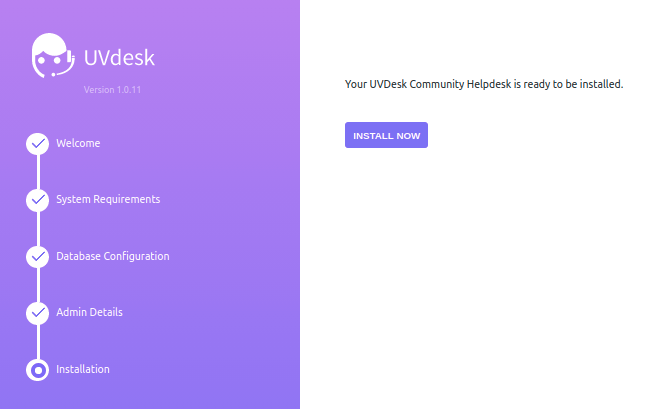
Step 7: Install Now
Click ‘Install Now‘ and wait a sec for the migration. Once it will be done you will get the Admin and Knowledgebase panel link.
7). Testing
UVdesk Open Source Helpdesk Customer/KnowledgeBase panel – http://domain/installed_folder/public/en/
Sign In as Customer – http://domain/installed_folder/public/customer/login
Sign In as Admin – http://domain/installed_folder/public/member/login
Support
Hope you find this user-guide helpful! Please let me know in the comment section below or you may reach out us at support@uvdesk.com